Stats2's tracking can be highly customized with Javascript via the stats2_custom object; some of these properties can also be set in your site preferences.
You can also log data manually, either from Javascript events, or internal scripts (PHP, etc).
Jump to:
stats2_custom - customize how the tracking code works on your website utm_custom - log custom data via URL parameters CSS tags - force our code to log clicks on website elements that it wouldn't otherwise
stats2_custom
Customize how the tracking code works on your website.
All stats2_custom properties can be set with Javascript for fine-grained, per-page or per-session control, but some are also available as site preferences.
They are separated into two distinct sections below.
You can declare stats2_custom and the properties you want to use with a single command, or you can just define stats2_custom as a generic JSON object and add the properties one at a time later. Which one you choose is up to you, although we do recommend the "one at a time" method. This is so that your logic for outputting this data doesn't have to be all in the same place, and so that you don't accidentally overwrite the entire object with a later call to it.
Each of these methods are shown in the examples below, and each accomplish the same end result: add a few session variables, change the session timeout to 20 minutes, and customize the page URL and title.
<!-- your hypothetical tracking code -->
<script src="http://my.stats2.com/123.js" type="text/javascript"></script>
stats2_custom.visitor
IMPORTANT!
Logging "Personal Data", such as a username or email address, requires disclosure in your site's privacy policy, and depending on the "legitimate interest" of the data, consent may be required as well.
The visitor property allows you to add your own custom data to a visitor session, such as a username or email. This data will be stored in our database and accessible whenever you request the details of this session, whether that's through the website itself, the API, or otherwise.
This is particularly useful if your website has an account system that your users login to. When a user is logged in, you can attach their username and other relevant information to their visitor session with this property. When you view your visitors list, if you logged a "username" (lower case, one word) key, that value will be displayed in place of their IP address or organization/hostname, breathing life into your visitors and allowing you to quickly identify who is who. An unlimited number of key/value pairs can be declared, but we ask that you please keep it reasonable.
Custom data is attached at the visitor level, so it can be aggregated over multiple page views. In other words you can declare the "username" property when they login, and something else later on when they complete a desired action, such as upgrading their account. We recommend you declare a "username" key on every page view, if available, since it receives special treatment, particularly in Spy.
You can also declare custom visitor data in a special URL parameter, utm_custom. An example use of this would be links in email newsletters, so click-throughs can be easily identified.
Custom data cookies
A few unique keys — "username", "name", and "email" — will be saved to a cookie automatically, so they will stick across visits, even if the visitor doesn't login on their next visit. These cookies expire after 30 days.
There is an order of priority when our code checks for custom data. First, it checks for any custom data cookies. Next, it checks stats2_custom.visitor. Last, it checks for utm_custom parameters in the URL. Each of these will override the previous one if there are any conflicts.
<!-- your hypothetical tracking code -->
<script src="http://my.stats2.com/123.js" type="text/javascript"></script>
stats2_custom.visitor_consent
Use this to flag a visitor as giving consent to tracking Personal Data. This will override your default visitor privacy settings and enable logging of full IPv4 addresses and use of tracking cookies.
How you obtain and keep track of a visitor's consent is up to you, but this is good in combination with a cookie banner. Keep the default privacy settings on, but when someone accepts all cookies or tracking of Personal Data, include the visitor_consent variable in your tracking code too, as shown below.
EEA law requires that you remind your visitors of this consent at least every 6 months and give them an easy way to withdraw their consent if they desire.
<!-- your hypothetical tracking code -->
<script src="http://my.stats2.com/123.js" type="text/javascript"></script>
stats2_custom.href
If your URLs are complex with many variables, but you only want to track certain variables to make your content more consistent on Stats2, override it with this property. Note that this only applies for page view action types. Downloads, outbound links, and events are tracked differently.
Let's pretend the page being viewed is /items.php?id=123&name=Some+item&cart_id=456&campaign=Google. The only thing you probably care about is the ID. You would do this to override it:
<!-- your hypothetical tracking code -->
<script src="http://my.stats2.com/123.js" type="text/javascript"></script>
stats2_custom.title
Use this property to override the HTML page title attribute. Note that this only applies for page view action types. Downloads, outbound links, and events are tracked differently.
Each unique URL for your website can only have one unique title associated with it. Page titles are cached and randomly updated every 100 page views, so if you change it with this property, you may not see it right away in the reports. Learn more here.
<!-- your hypothetical tracking code -->
<script src="http://my.stats2.com/123.js" type="text/javascript"></script>
stats2_custom.goal
You can manually declare when a goal has succeeded using this property. You need to declare goals this way if you want to track revenue for them. You may also wish to use this method if the needs of the goal are too complex for our funnel system.
This property is a JSON object, which has 2 of its own properties: ID, and revenue. ID is required, revenue is optional. Each goal has its own unique numeric ID in our database. The goal management page for any website lists the ID for each goal next to the goal's name.
To track revenue, your code will need access to the value of the revenue, either through Javascript, cookies, or internally. You will need to talk to your shopping cart provider to discover how you can access and output this value.
Note that stats2_custom.goal is NOT the same as the stats2.goal() function. stats2_custom.goal is for declaring a goal within the HTML of your page, and must be declared before the standard tracking code. stats2.goal() is for declaring goals with Javascript events.
<!-- your hypothetical tracking code -->
<script src="http://my.stats2.com/123.js" type="text/javascript"></script>
We also support "dynamic" goals, which do not need to be predefined in our system. Instead you simply declare the name of the goal in your Javascript and we'll automatically handle the rest. One big advantage with dynamic goals is that their overhead is negligible, so there are no limits on how many you can create. The downside is that you can't change their names, choose an icon for them, or use funnels.
To declare a dynamic goal, just use 'name' instead of 'id', and set whatever name you want to use! You can use revenue with dynamic goals as well, if desired.
Further documentation for dynamic goals is embedded with the goal setup page for any of your sites.
		<script type="text/javascript">

		  var stats2_custom = stats2_custom || {};

		  stats2_custom.goal = {

		    name: "New user",

		    revenue: "49.95"

		  };

		</script>


	<!-- your hypothetical tracking code -->

	<script src="http://my.stats2.com/123.js" type="text/javascript"></script>
stats2_custom.split
You can split test any or all goals you have setup for your site with this option. Full documentation is embedded within the goal setup page for any of your sites, but an example of the code is shown below.
<!-- your hypothetical tracking code -->
<script src="http://my.stats2.com/123.js" type="text/javascript"></script>
stats2_custom.pageview_disable
When our tracking code is loaded on your website, it will automatically log each page view as it happens. You can disable functionality with this property, if desired. This is useful in scenarios where you only want data logged for certain events and actions.
If this is enabled, data will only be logged when your site manually calls stats2.pageview(), stats2.log() or stats2.goal(). These are public javascript methods built into our tracking code.
If you call stats2.pageview(), don't pass it any parameters. It will automatically grab the current URL and the page title and send them our way.
If you don't call stats2.pageview() at all, note that screen resolution, browser language, and external referrer won't get logged, which is highly undesirable in most circumstances.
<!-- your hypothetical tracking code -->
<script src="http://my.stats2.com/123.js" type="text/javascript"></script>
stats2_custom.ping_disable
By default, our tracking code will periodically ping our tracking servers while a visitor is sitting on a single page, for up to 10 minutes. This helps us give you much more accurate time-on-site values for each visitor than most services offer, particularly for visitors who only have one page view. However, you can disable it if you wish, by using this option.
The equivalent of this property can be managed in site preferences, by setting ping timeout=0
<!-- your hypothetical tracking code -->
<script src="http://my.stats2.com/123.js" type="text/javascript"></script>
stats2_custom.osa_disable
If there are any specific pages on your website that you do NOT want the on-site analytics widget to appear, e.g. an admin area of your site, then set this variable to disable on those specific pages.
If you are looking to turn off the widget entirely, check the knowledgebase for instructions.
<!-- your hypothetical tracking code -->
<script src="http://my.stats2.com/123.js" type="text/javascript"></script>
stats2_custom.heatmap_disable
If there are any specific pages on your website that you do NOT want to log any heatmap data, e.g. an admin area of your site, then set this variable to disable on those specific pages.
Note that we do not track history.replaceState() automatically, as its purpose is quite different from pushState.
You may want to disable this, for example if you have already added custom code to log page views to Stats2 within your core methods that call history.pushState(). In that case, use this option.
<!-- your hypothetical tracking code -->
<script src="http://my.stats2.com/123.js" type="text/javascript"></script>
stats2_custom.track_iframe
This option is only relevant when the tracking code is installed in an iframe rather than the actual page itself, AND the frame and parent documents are both on the same domain, AND you are trying to track the frame instead of the parent document. There is almost no circumstance where this is what you actually want to do, but it was created for those rare edge cases.
If the frame and the parent document are on the same domain, we'll track the parent URL, page title, and referrer automatically. (This is usually the desired behavior, as most often the code is only in a frame if your host makes you put it there for security reasons).
If they are on different domains, then the code can't access the parent document at all, so it can only track the frame itself. (The only thing from the parent document that our code will see is the parent document URL as the referrer. Up until recently this may have been interesting, as it would contain the full URL of the parent page, which we could display as the URL being viewed. But as of early 2021, all major browsers default to masked referrers. We still log these but we won't pretend they're the actual URL since they almost never will be).
<!-- your hypothetical tracking code -->
<script src="http://my.stats2.com/123.js" type="text/javascript"></script>
stats2_custom.getHighEntropyValues
Request more information about a user agent than is exposed by default. This uses the navigator.userAgentData.getHighEntropyValues() method available in Chromium-based browsers (we used the same name with camelCase to highlight this relationship).
The properties we'll attempt to access are platformVersion (needed to detect Windows 11), and model (for mobile devices, e.g. "Pixel 5a").
This is not done by default because future browsers may show a permissions popup to a visitor when this data is requested. We are not aware of any browsers that do this now (as of March 2022), but the groundwork is laid for this to be possible in the future, and we never want to do something by default that would show a permissions popup to your visitors.
Note: this API is only available in HTTPS context. Most sites are secure these days, but in case yours is not, this option will not work.
<!-- your hypothetical tracking code -->
<script src="http://my.stats2.com/123.js" type="text/javascript"></script>
stats2_custom.heatmap_objects
Heatmaps are sometimes muddled by other JavaScript events on a page. When a JavaScript event invokes a function which stops its propagation, Stats2's code is not notified of the events and thus heatmap data may be slightly skewed. If you have code on your website which does this, you may tell Stats2 explicitly to listen for such onClick events.
If there's only one event you need Stats2's code to listen on, just specify it as a string. If there are multiple events you need Stats2's code to listen on, then create an array of strings. Items can be specified as "tags", ".classes", or "#ids".
<!-- your hypothetical tracking code -->
<script src="http://my.stats2.com/123.js" type="text/javascript"></script>
stats2_custom.cookie_domain
This is for advanced users only. You should only consider using this option if you are intimately familiar with the way cookies work.
By default, the domain "scope" for our tracking cookie will be set to ".current-domain.com". The "." at the beginning means it will apply to every sub-domain of the current domain. We automatically account for "www", so a visitor to either "yoursite.com" or "www.yoursite.com" would both get a cookie for ".yoursite.com", which would then apply to every sub-domain of the root domain. This is generally desirable so we can track the same person across multiple sub-domains.
However, a new visitor to your site who initially arrives at "subdomain.yoursite.com" would get a cookie for ".subdomain.yoursite.com". In this case, if either "yoursite.com" or "www.yoursite.com" are directly accessible as well, this visitor would receive a new cookie if/when they visit your root domain after visiting the sub-domain. This would make them appear a new unique visitor, which is not the desired result. In this case, you would want to override the default cookie scope to ".yoursite.com" so that no matter what sub-domain the visitor arrived on or is currently on, they are seen as the same visitor.
Example: (supposing your site has multiple sub-domains)
		<script type="text/javascript">

		  var stats2_custom = stats2_custom || {};

		  stats2_custom.cookie_domain = ".yoursite.com";

		</script>


	<!-- your hypothetical tracking code -->

	<script src="http://my.stats2.com/123.js" type="text/javascript"></script>
There is also another scenario where you may wish to override the default behavior. If your site is only accessible via "yoursite.com" or "www.yoursite.com" (and the "wrong" one redirects to the "right" one automatically), and you only use sub-domains for hosting static content (Javascript, images, etc), then you'd want to set the cookie domain to just this public domain. Otherwise, the cookie we set will also be sent with every request to your static domain.
In most cases this is not a major concern, but if you have hundreds of thousands of daily page views, the excess bandwidth used by the cookie being sent with every request to your static domain may be a concern, or you might worry that it will conflict with a cookie name that you already use internally. (Our cookie name is fairly unique though - _jsuid - so this is unlikely). By setting the cookie to only the current domain, then our tracking cookie will only be sent for requests directly to the current domain.
IMPORTANT! The HTTP cookie specification states that the domain for a cookie must contain two periods. That means that if you redirect "www.yoursite.com" to "yoursite.com", you can not set the cookie domain to just "yoursite.com", because it only contains one period. If this applies to you, then your only choice is to stick with the default domain of ".yoursite.com" (with a period at the beginning) that our tracking code sets.
Example: (supposing your site is only directly accessible via "www.yoursite.com")
		<script type="text/javascript">

		  var stats2_custom = stats2_custom || {};

		  stats2_custom.cookie_domain = "www.yoursite.com";

		</script>


	<!-- your hypothetical tracking code -->

	<script src="http://my.stats2.com/123.js" type="text/javascript"></script>
stats2_custom properties that can also be set via site preferences:
stats2_custom.timeout
Our tracking code automatically pings our servers when a visitor remains on a single page, so we can more accurately track the actual time they spend on your site. By default, after 10 minutes, this pinging will stop. Depending on the type of site you run, you may want to set this value higher or lower.
Minimum value is 5 (minutes), maximum value is 240 (4 hours). Set to 0 to disable pinging (equivalent to ping_disable=1).
<!-- your hypothetical tracking code -->
<script src="http://my.stats2.com/123.js" type="text/javascript"></script>
stats2_custom.outbound_pattern
If your site uses redirects for outbound links, instead of links that point directly to their external source (this is popular with affiliate links, for example), then you'll need to use this variable to tell our tracking code additional patterns to look for when automatically tracking outbound links. This is because our tracking code has no way of knowing what will actually happen when the link is clicked on. Redirects typically look like internal links to our tracking code, so we don't track them by default.
So what do you use for the pattern? Some common redirect URLs we see are like this:
What you'll want to enter here is the the base part of these URLs, e.g. '/go/' or '/outbound/' or '/aff/'. You'll want to make sure whatever it is you use though is unique to your redirects, otherwise other links may start getting logged as well.
If there's only one pattern you need to match, which should be the case for most sites, just specify it as a string. If there are multiple patterns you need to match, then create an array of strings.
<!-- your hypothetical tracking code -->
<script src="http://my.stats2.com/123.js" type="text/javascript"></script>
stats2_custom.html_media_track
This option enables the automatic tracking of HTML5 video and audio files on your website. Warning, this can lead to a very large and unexpected traffic spike if you have any videos that automatically play on your website, so be careful!
<!-- your hypothetical tracking code -->
<script src="http://my.stats2.com/123.js" type="text/javascript"></script>
stats2_custom.outbound_disable
When our tracking code executes on a web page, it automatically parses through all of the links on the page and determines which ones are outbound links and file downloads, and adds event listeners to them so we can track clicks on them.
If you want to disable this automatic tracking for any reason, you can do that with this property. When this property is enabled, you can still use CSS tagging to manually log specific links.
<!-- your hypothetical tracking code -->
<script src="http://my.stats2.com/123.js" type="text/javascript"></script>
stats2_custom.sticky_data_disable
Set this option to disable saving certain types of data in cookies, without disabling cookies entirely.
Currently, dynamic (UTM) campaigns, referrers, and a few types of custom visitor data may get saved as cookies for 30 days so they stick across visits.
<!-- your hypothetical tracking code -->
<script src="http://my.stats2.com/123.js" type="text/javascript"></script>
utm_custom
IMPORTANT Your visitor privacy settings may cause this parameter to be ignored for some or all visitors.
utm_custom is a special URL parameter you can add to your pages to attach custom data to visitor sessions very easily, no programming required. The name "utm_custom" was chosen because this would typically be related to some kind of campaign (e.g. email blasts), and "UTM" variables are already commonly used for tracking online campaigns for Urchin, Google Analytics, and of course Stats2.
Since this is a "special" variable, it works differently than any other UTM campaign variables:
Stats2 only processes UTM campaign variables for a visitor's landing page, but utm_custom can be declared at any time (because custom data can be attached to a visitor at any time).
Stats2 groups campaigns by utm_campaign (which is used to 'name' the campaign), so we only process UTM campaign variables if utm_campaign is specifically declared. However, since utm_custom has a different although possibly related purpose, it can be declared by itself and it will still be logged.
utm_custom is attached at the visitor level, not the campaign level, so you will only see it in the visitor's report.
utm_custom is an associative array, which means it can take one or more pairs of keys and values. At least one pair is required, or it will be ignored. To set an array in a URL, you use this format: utm_custom[key]=value
IMPORTANT!
Some email services, such as Mailchimp, will filter out the bracket characters '[' and ']', required for utm_custom to work its magic. In this case, we recommend URL encoding the utm_custom[var] parts of your URL, so they look like utm_custom%5Bvar%5D instead.
username is a special custom key that will show up in your visitor's list report, as well as in Spy. So we recommend always declaring this variable if possible, even if it's not necessarily a "username". It could be their real name or their email address or whatever you want, but since it is treated in a special way, it is handy to use.
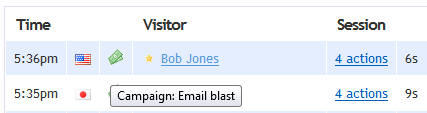
Let's pretend you have 100 subscribers to an email list. Your code could customize the links for each person receiving the email, so if any of them click it, you will know who is who when they arrive at your site. If one of your subscribers was Bob Jones, email bob@jones.com, his links could be formatted like this (we've also added in "normal" UTM campaign variables here, you can learn more about these on your site's campaign setup page):
You would then see him like this in your visitor's list:
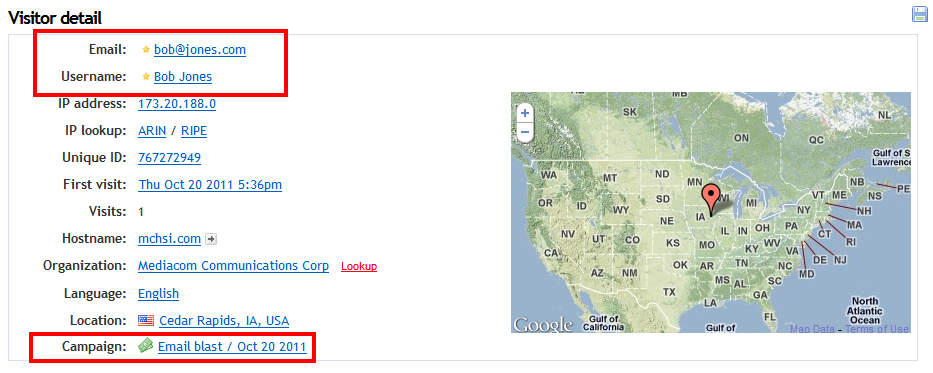
And you would see the following (highlighted) details when viewing the session:
Manually tagging a link as a download, outbound link or click
Here is the regex string from our tracking code that contains all of the file extensions it looks for within links on a page. Any link that ends with a period followed by one of these extensions will be tracked as a download, e.g. <a href="https://coolsite.com/greatsong.mp3">Download my great song</a>. Don't know regex? Each file extension we look for is separated by a "|", and a "?" means the previous character or parentheses set is optional.
Note, we sometimes forget to update this list when we add support for new file extensions. The last update was March 21, 2022.
7z|aac|apk|avi|cab|csv|dmg|doc(x|m|b)?|epub|exe|flv|gif|gz|jpe?g|js|m4a|mp(3|4|e?g)|mobi|mov|msi|ods|pdf|phps|png|ppt(x|m|b)?|rar|rtf|sea|sit|svgz?|tar|torrent|txt|vcf|web(p|m)|wma|wmv|xls(x|m|b)?|xml|zip
Likewise, links that don't point to your website and start with the protocols listed below are automatically tagged as outbound links:
http, https, mailto, ftp, telnet, tel
You may wish to log downloads and outbounds on additional links that aren't supported by default by our code. Or, your site may have downloads and outbound links that link to an internal script first (typically to log the action in your own database) and then redirect the user to the actual file or link. These types of links do not get tagged automatically as downloads or outbounds, because they just look like internal links to the tracking code. There's no way for our code to know what will actually happen after the link is clicked.
Because of this, Stats2 has a feature that lets you force the tracking code to tag a link as a download, outbound link, or click. Simply add one of the following classes to any link on your site, and our code will treat it as you have specified. The last class listed (stats2_log) is for the 'click' type. Otherwise, use stats2_log_download or stats2_log_outbound if you want it to be marked like that.
These are logged similar to normal pages on your site with a URL and title. These are automatically extracted from the link by our tracking code. If there is no text for the link, we try to grab something meaningful instead. For example, if it is an image, we'll grab the URL of the image and use that for the title instead.
If you wish to customize the URL and/or title for these, you'll need to use our stats2.log() javascript function.
You can also exclude specific links from being automatically counted as downloads or outbound links, if desired. You just need to add the class "stats2_ignore" to the links you want ignored.
 0 online
0 visitors
0 actions
0 online
0 visitors
0 actions